![]() The API blocked requests from Nightbot, the command is dead.
The API blocked requests from Nightbot, the command is dead. ![]()
Oh okay, alright, let’s go through a quick course then! ![]()
To add a command you have two options, through the dashboard, or through your chat.
Let’s start with the dashboard:
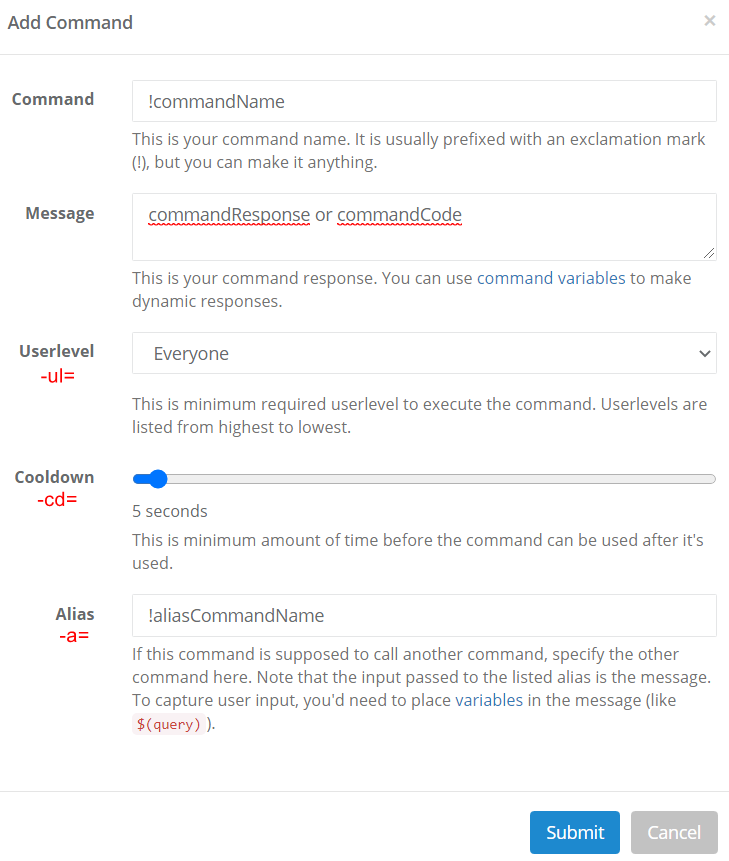
- First, use the
Commandfield to give the command a name, add the prefix if you wish to have one, the!(exclamation mark) is often used. - Then fill the command response in the
Messagefield, it can be just text, or JS code inside an$(eval)variable which will generate a text output. - If you want to restrict the command to be used by specific users, use the
Userlevelfield. - If you want the command to have a general cooldown (not an user-cooldown), use the
Cooldownfield. - And finally, if you need it, there’s an
Aliasfield, it’s basically a command called right after the one you called. It won’t post the output of both commands, this is a common misconception, it took me a while to understand them. The alias command takes in input the output of the first command thanks to$(query). It’s particularly useful when dealing with conditional$(urlfetch)or if you need to format the input given to a command before sending it to the$(urlfetch)(which is what I did above) because Nightbot fetches the URL before executing the code.
To add commands through the chat, follow the following syntax:
!addcom !commandName -ul=userlevel -cd=cooldown -a=!aliasCommandName commandResponse or commandCode
-ul=, -cd=, and -a= are all optional.
You can also edit or delete a command through your chat with respectively:
!editcom !commandName -ul=userlevel -cd=cooldown -a=!aliasCommandName commandResponse or commandCode
!delcom !commandName
You can’t rename or fetch the command code through the chat though.
You can find all this in the documentation:
• !commands
• variables
Hopefully that helps you understand how to use the bit of code I gave you, feel free to ask for confirmation if you want to make sure you understood properly. I don’t want to feed it to you though, it’s a good occasion to learn.